Collaborative technology has helped us create a responsive social media strategy with a remote working team supporting event attendees across the globe.
Does your agency work with clients in other provinces or countries? Your life is about to get so, so much easier. . .
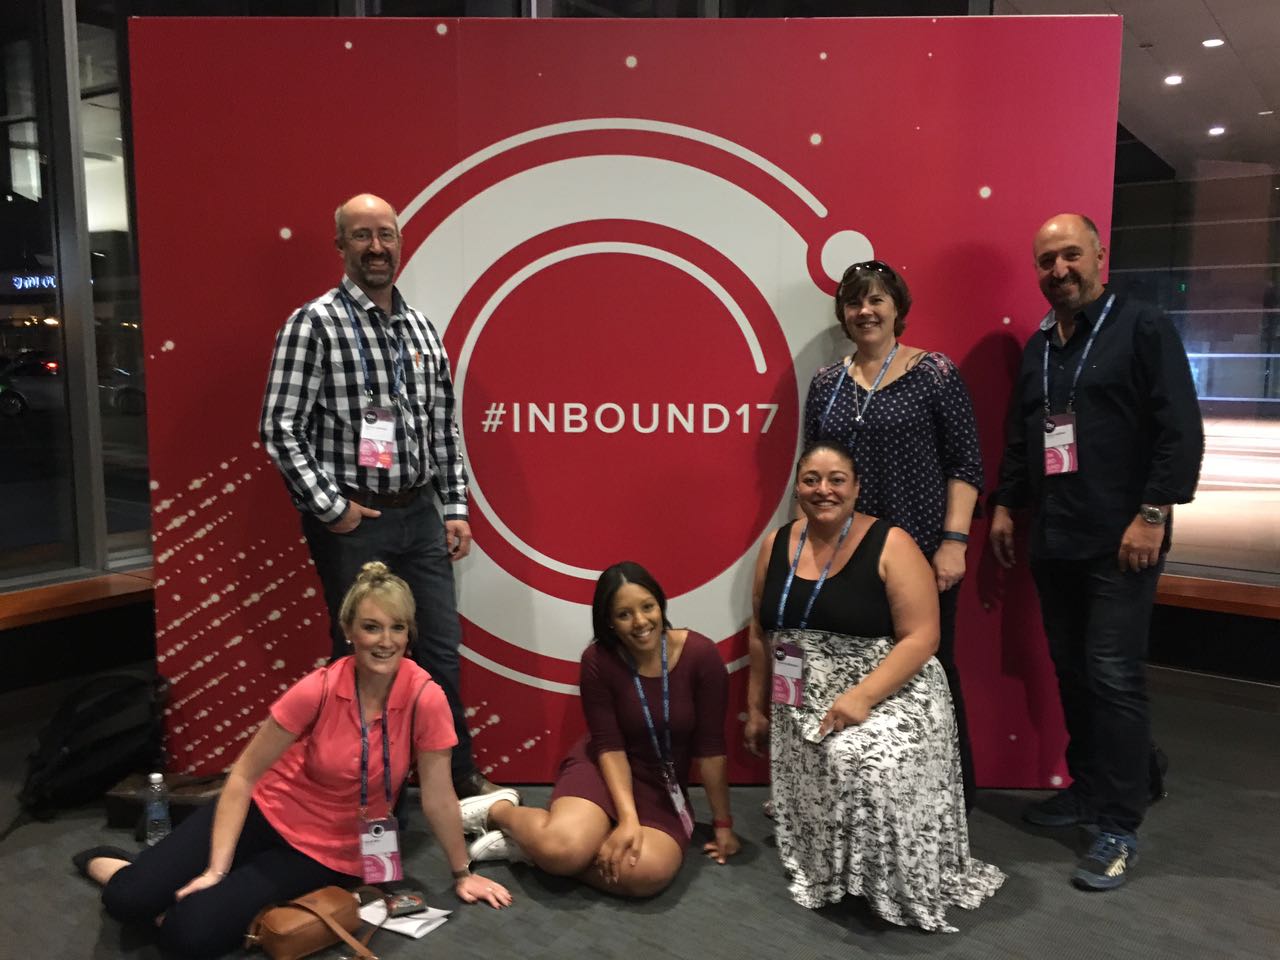
Some of our team members attend HubSpot’s annual Inbound Conference in Boston each year, and each year the remainder of our team back home helps cover the event in real-time. With a seven hour time zone difference between Boston and Johannesburg, this can be quite a challenge, especially with the responsive demands of social media.
Here’s how we covered the big event live from two different continents. . .
There’s nothing quite as chaotic as tight deadlines while covering events live, but collaborative workspaces makes it easy for your team to provide a rapid turnaround time - without worrying about the wrong files getting lost in the chaos.
Our process outline to achieve this is (remembering that you need to have a clear goal for responsiveness and inform the team of the process you will be implementing) :
- Event attendees share takeaways of each talk with the responsive team
- The responsive team add this information to social media within the time the talk is happening and post on the company social media platforms, tagging the relevant people.
- Event attendees then share the social posts on their personal accounts.
- A daily round up of these posts as well as other social media posts from the event is then created and posted on the blog.
To do this we had to take a number of steps to allow the event attendees and the responsive-at -home-team to share the information seamlessly.
But if we take a step backwards, our process actually started with our strategy.
When it comes to cloud collaboration, proper planning is crucial to the success of your campaign or event.
- Decide on your strategy beforehand.
Hold a brainstorming session and make sure that each team member has a clear understanding of their role and responsibilities. This includes deciding how you plan to execute the strategy (e.g. will we be using Docs, Slides or Sheets to communicate?). Our strategy was to be as responsive as possible, and to build up not only our brand as a go-to thought leader during the biggest inbound marketing conference of the year, but also to build up the reputations of the event attendees. We decided to do this by creating visual, shareable content - such as social media cards with three key takeaways from the talk. These were branded, shared by the attendees, and then re-shared or retweeted by the official brand accounts.
- Set up documents and templates beforehand.
For Inbound17, we used Google Slides to create templates which would be used as images for social media, as they can easily saved as JPEGs and uploaded wherever they’re needed. This saved us time having to wait for the design team to create images in a specialised design tool.
We also created a shared learnings document in Google Docs, where our team could document their learnings from their smartphones during the talks they attended. One teammate could type up a talk live in Boston, while another one live tweeted the talk from the document in Johannesburg. This also meant the team back home had access to everything they needed to put together blog posts and social media posts responsively.
This helps for on the ground, immediate communication (like sharing photos). This also removes the possibility of someone missing an email in their inbox, which delays communication. This group essentially served as a push notification for team members about talk notes and completed images.
- Share and give permission for appropriate documents beforehand.
This sounds obvious, but make sure you do all the admin before the event starts. Ensure all the right people have access to everything they need so that there’s no running around, requesting for permissions when time is of the essence.
Here’s a list of some of the key features of the Google Suite apps, which we used to collaborate successfully via the cloud for INBOUND17.
Live commenting
Commenting allows you to communicate with your teammates from within the document. Simply highlight whatever element of the document you’d like to comment on, and a little comment widget will appear to the right of the document. Click on that, and a box will appear for you to comment. Your colleagues are then able to reply on that comment, creating a trackable string of communication around that particular element of the document.
If you want to leave a message for a specific person, you can use @ or + followed by their email address (e.g. +email@spitfireinbound.com) to assign the comment to this person. This is a great tool for assigning tasks and responsibilities from inside the document.
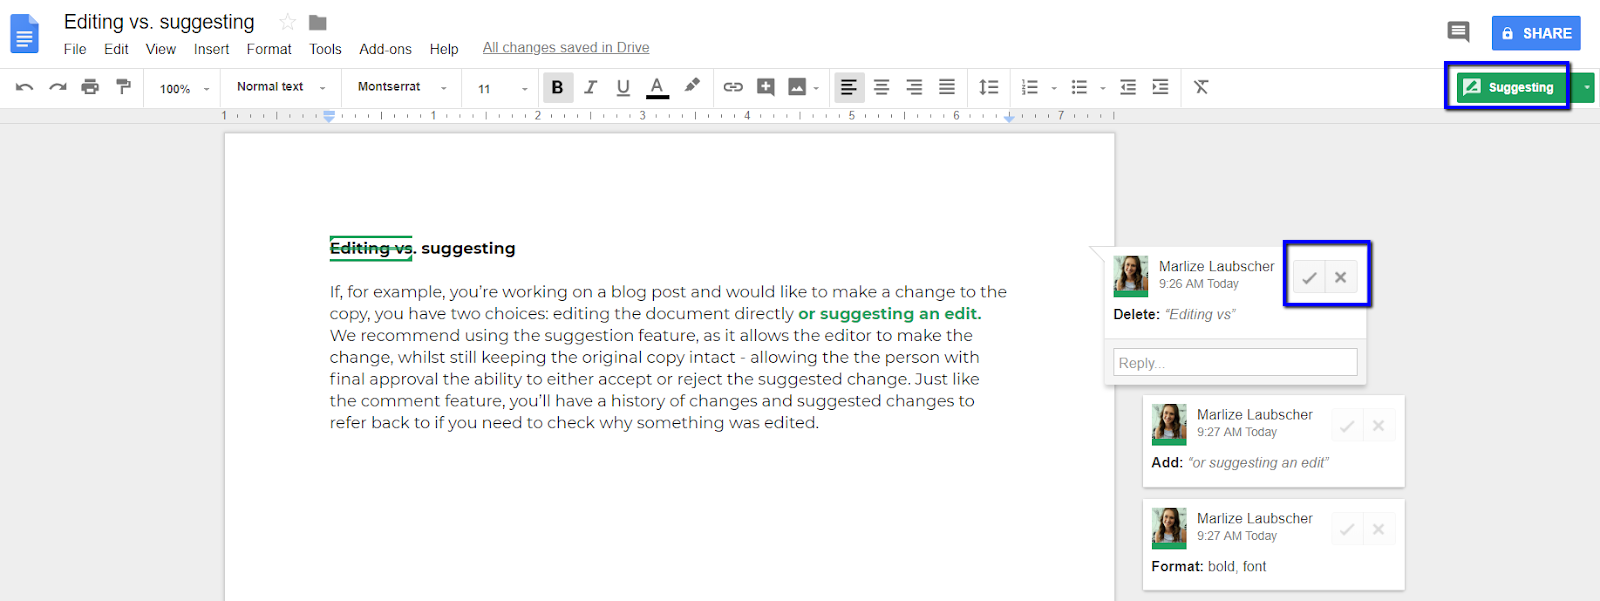
Editing vs. suggesting
If, for example, you’re working on a blog post and would like to make a change to the copy, you have two choices: editing the document directly or suggesting an edit. We recommend using the suggestion feature, as it allows the editor to make the change, whilst still keeping the original copy intact - allowing the the person with final approval the ability to either accept or reject the suggested change. Just like the comment feature, you’ll have a history of changes and suggested changes to refer back to if you need to check why something was edited.
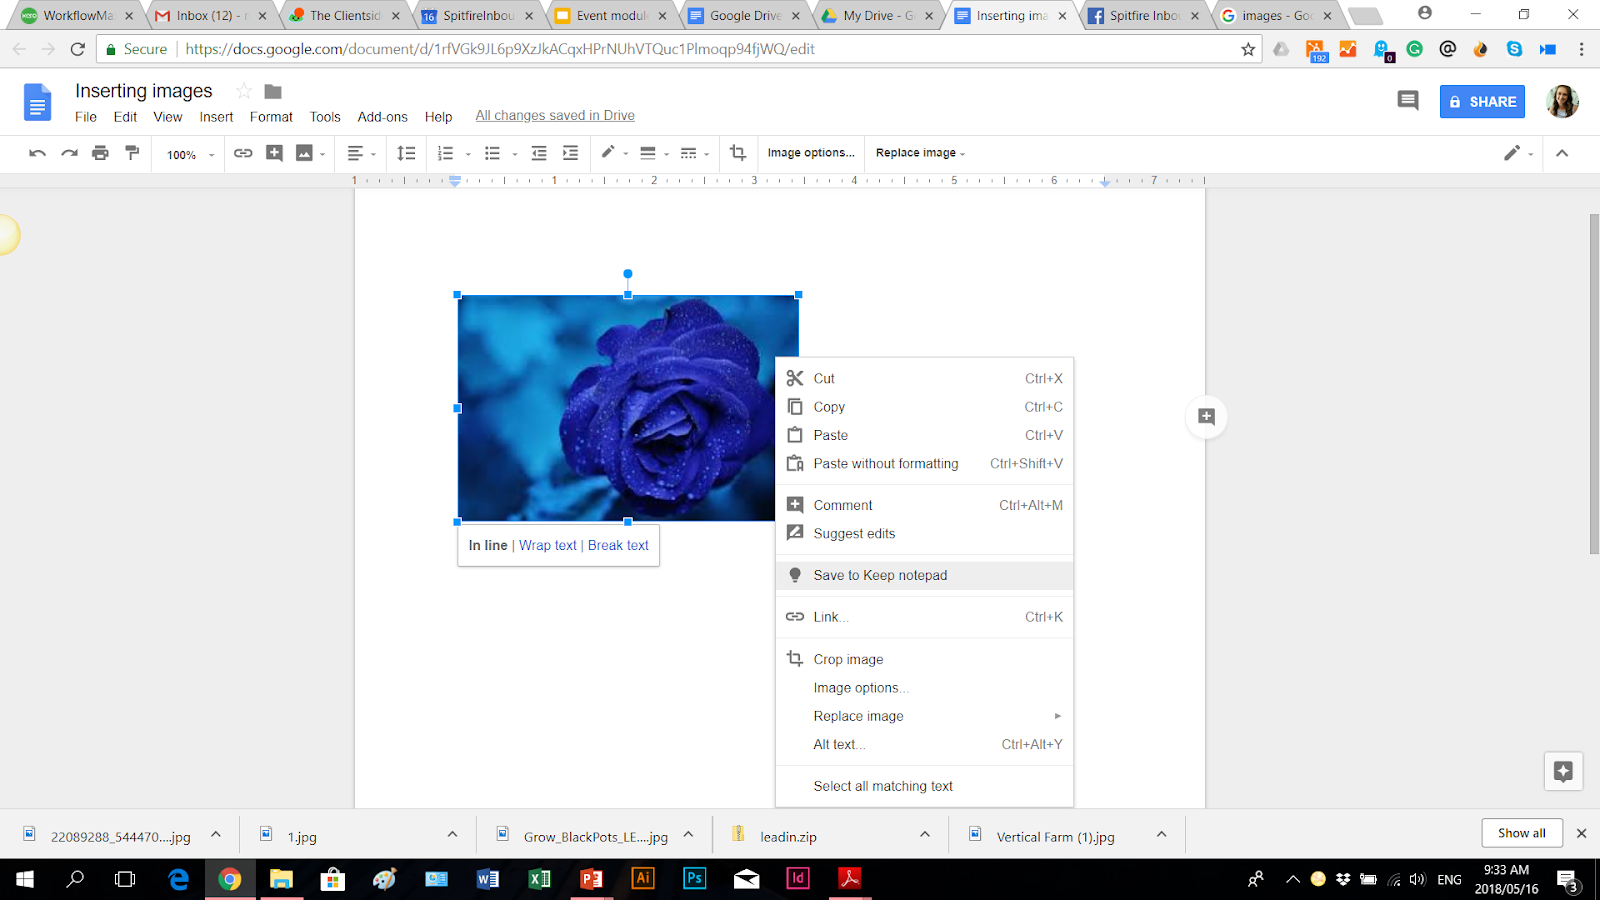
Saving and inserting images
One of the advantages of cloud based technology is that you can save all your images to a folder on the shared drive, and your team can insert images into their document straight from this folder. Keeping everything accessible to the whole team from a central image bank can save time emailing or transferring images between devices.
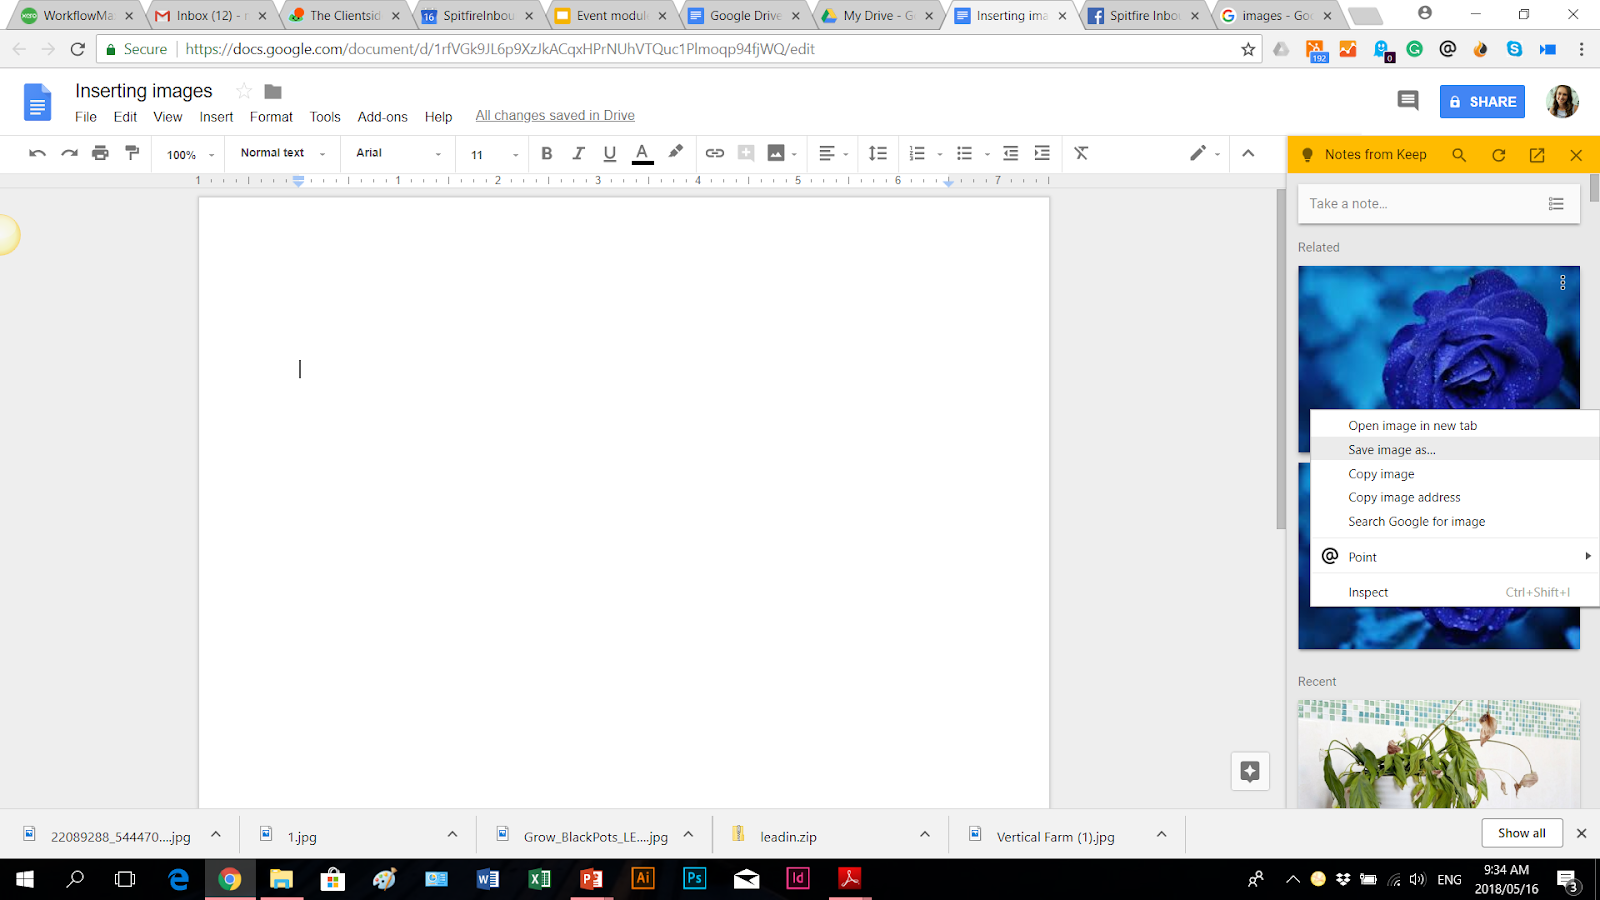
Steps on saving images from a google doc:
- Right click on the image
- Choose ‘Save to keep to notepad’
- A notepad on the right will open. Click right on the image
- Choose save as image as and save in appropriate folder
Drag and drop images straight into the document
Another great feature when it comes to inserting images, is the ability to just drag and drop images straight from your desktop into the document. Your teammates can save images straight from the shared document by right clicking the image, selecting save to notepad and then right clicking the image on the notepad and selecting the “save as” option.
Syncing to your computer (when working offline)
By downloading the Google Suite apps onto your mobile device (or using the Google Chrome browser on desktop), you can work on files while you’re offline (as long as you’re signed into Google before you reach the dead zone).
Make sure you keep “Offline Sync” turned on.
Adding links into your document
Insert hyperlinks into your document for easy referencing.
When documenting work that you share with your client or agency, you often need to link to other articles or supporting documents.
If you click on a hyperlink within a Google document, it will open the link as a new tab in your browser.
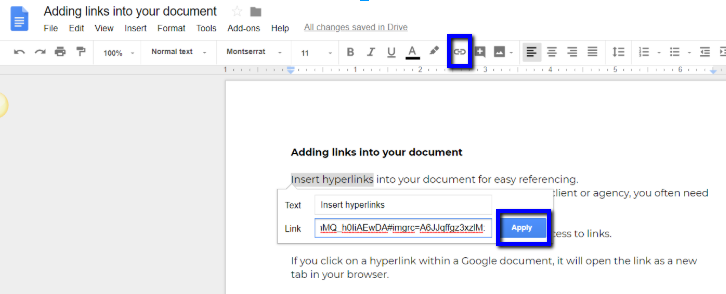
Steps on adding hyperlinks in a google doc:
- Highlight the text you want to link
- Click the link icon either on the menu bar, or right click and choose link
- Add your URL to link to and say apply
Live linking between sheets and docs
You can add links between Google Suite apps and documents. For example, if you’re working inside a Google Sheet but would like to reference something in a Google Doc or another Google Sheet, you can create a live hyperlink between documents, allowing you to seamlessly switch between files, commenting and communicating without having to keep looking for where files have been saved.
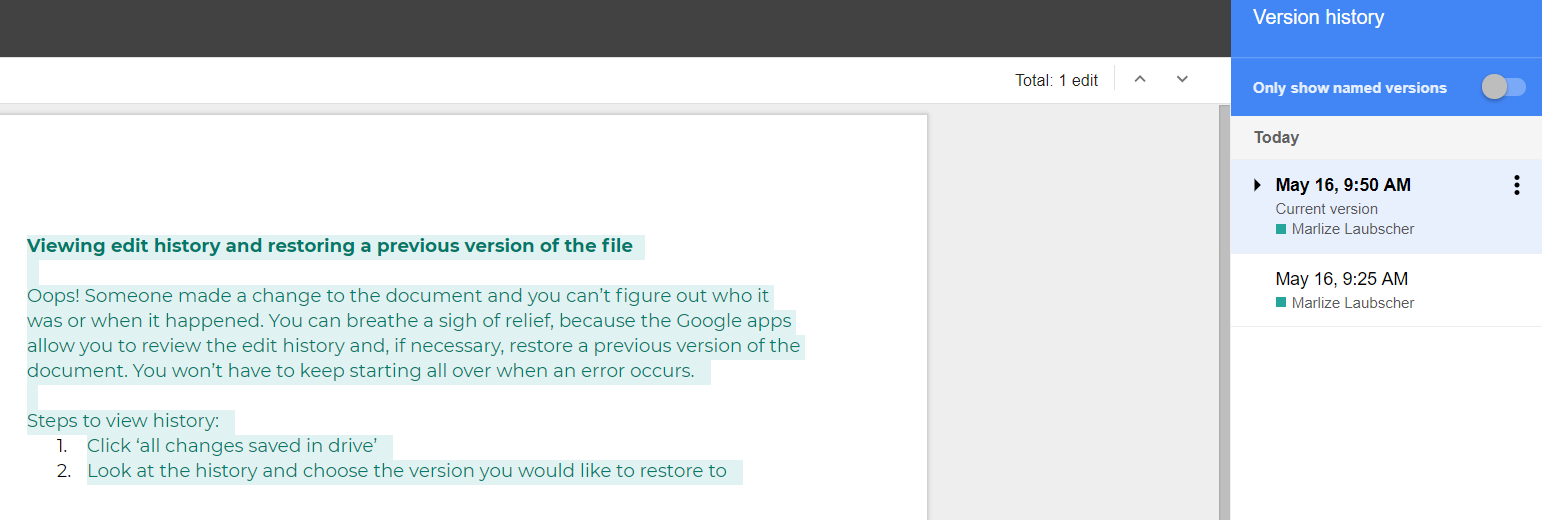
Viewing edit history and restoring a previous version of the file
Oops! Someone made a change to the document and you can’t figure out who it was or when it happened. You can breathe a sigh of relief, because the Google apps allow you to review the edit history and, if necessary, restore a previous version of the document. You won’t have to keep starting all over when an error occurs.
Steps to view history:
- Click ‘all changes saved in drive’
- Look at the history and choose the version you would like to restore to

Share once changes have been made
Once you’ve commented or suggested or made changes to the document, you can simply click the “Share” button in the top right hand corner of the document, and your colleagues and clients will receive a notification alerting them that changes have been made.
Looking for more insights into productivity? Download our guide, Navigating Productivity: Some thought starters for more tips and tool suggestions.