The power of video has been widely discussed among marketers but now, thanks to HubSpot and Vidyard, it can also be used by salespeople as a prospecting tool.
With HubSpot Video, sales teams have a simple way to create one-to-one videos and share them inside of HubSpot. These videos can feature their screen, quickly be sent to prospects via email, and are tracked through the CRM. Personalised videos like these can really help salespeople cut through the noise and connect with prospects.
Videos can be created using tools like Loom or Vidyard.
Our sales team finds Vidyard a painless, low production option to communicate in a very human way with prospects, no matter the distance or time differential. The video format in sales emails in particular are a powerful way to build stronger relationships with prospects by creating, sharing, and tracking personalised content right from the HubSpot CRM. And we wanted to share our learnings with you.
Using Vidyard with HubSpot we’ll show you how to:
- Record a video in Vidyard via HubSpot
- Send the video via email
- Shoot a video (tips)
- Use video for prospecting
1. How to record a video in Vidyard via HubSpot
With the new partnership between HubSpot and Vidyard, recording videos has become even easier. As a salesperson you don’t want to use any processes that are going to take time, which is why HubSpot lets you record your video right in the platform. Here’s how you can do that:
- Open a new email, either in HubSpot or your email platform
- Click on the video icon at the bottom or click ‘insert and video’ (depending on your platform)
- You’ll then get 3 options
- Pick the one you would like to do, for example ‘record screen’
- Make your recording and click ‘stop’
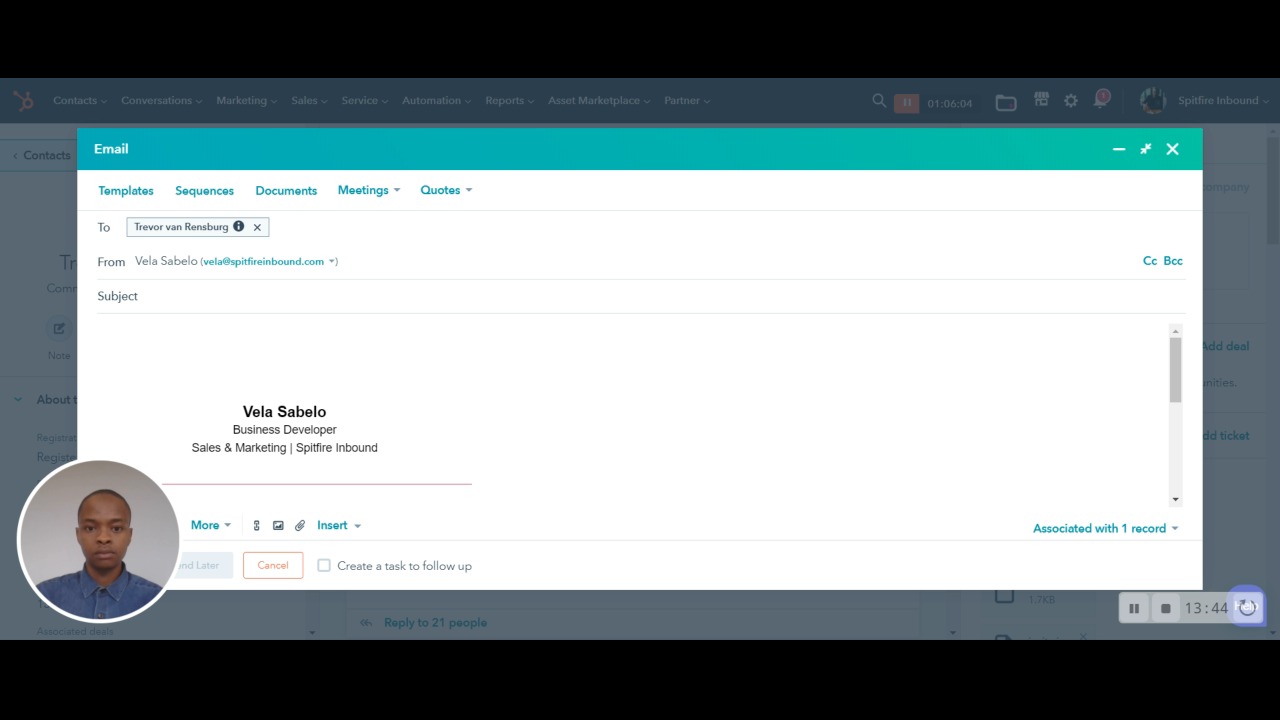
Now your video will be saved to your Vidyard account and will not only be ready to add immediately, but will be available for any future prospect you may want to share it with. You can also pre-record any video and upload it to Vidyard via this method.
Once you’ve recorded your video, you’ll want to embed it in your email.
2. How to send a video via email
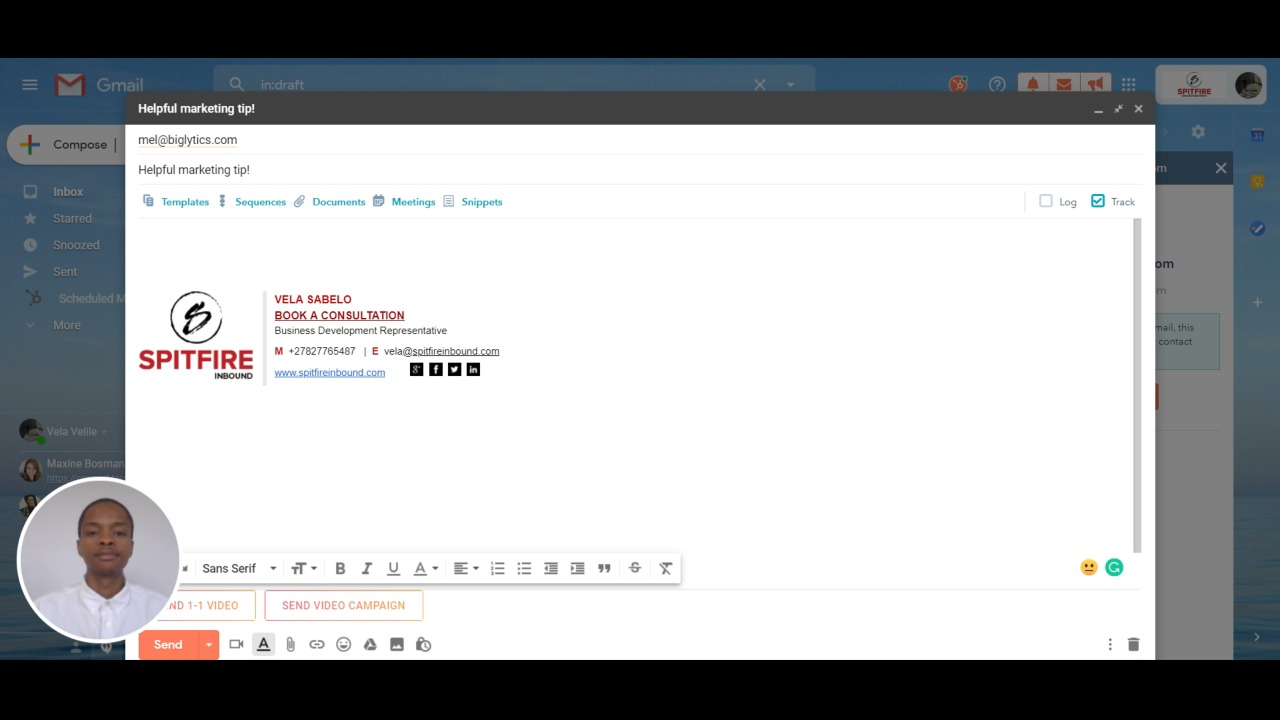
Videos embedded in emails that actually play within an email are not supported by most email platforms. What we recommend, and what HubSpot automatically does (as seen in the previous video), is have a thumbnail of the video that links out. If you want to be a bit more creative, you can create a GIF thumbnail to make the image look more like a video.
As mentioned, you can send any video to any prospect once it’s recorded. If you would like to send a video that is in your Vidyard library, click the video icon next to the send button on your Gmail email. This will bring up a list of all the videos you’ve created and you simply click on the video you would like to send. It will automatically play the video for you to see if it is the correct one. You can see how to do this step-by-step in the video below.
Go the extra mile and turn your entire business into a lead generating machine, download our Sales Playbook to find out how.

3. Tips on how to shoot your videos
The way you shoot your video can have just as big an impact on the viewer as anything else and you want to make sure your prospect is looking where you want them to. Take a look at this video for some tips and examples:

In case you’re more of a wordsmith, here’s a short summary of what I touch on in the video:
- Background: you don’t need a plain, white wall as a background for every video you record. Just ensure that it’s clean with no distractions.
- Lighting: it’s okay if you don’t have any lighting equipment. Just make sure to choose a location with enough natural lighting so your viewers can see you.
- Audio: the laptop you use will determine the quality of your audio. You can plug in an external mic or headphones to improve the quality of the audio so your viewers can hear you clearly.
4. How to use video prospecting
Being able to create a video is great, but understanding how to use the video for prospecting in inbound sales is really the big win. One of the key things is to ensure that you do your research before you create the video:
- Look at your prospects website
- Find out who is the best person to contact
- Personalise the video as much as possible
Take a look at this video for an example of how to use video to prospect and more tips:

Why did HubSpot choose Vidyard?
In a nutshell… because it ticked all the boxes. When HubSpot decided to add video to their impressive arsenal of tools they wanted a partner that aligned with their goals and offered the same experience for users:
- Ease of use
- Affordability
- Accurate reporting
Using the Vidyard Chrome extension gives more options than HubSpot video, whether you’re using the free or paid version. Even if you don’t have the HubSpot and Vidyard integration, you can still see the number of viewers and other data but it isn’t as in depth as it would be if you were using HubSpot Video in HubSpot Sales Pro.
Now that you know how to make and use videos for sales, try it out for yourself. And if you’re not sure how to get started on video for your business - we’re happy to help. Simply book a time for a consultation with our inbound expert.